Using Console
Start the Console
Double-click the Evolve IMSWorkX Console shortcut on the desktop, or click .
The Getting Started window appears when you launch the Console for the first time. If necessary, clear the Show this message again check box.
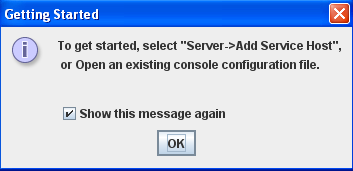
Click OK to display the unpopulated Console main window.
Add Service Hosts
Manually Add Service Hosts
You can manually enter information to add a specific service host.
Click .
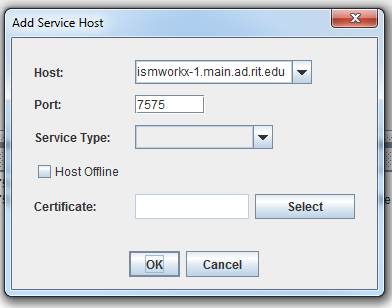
In the Host field, enter the IP address or machine name of the service host to add.
In the Port field, enter the number of the port specified in the ps_master_config.xml file on that service host.
In the Service Type field, select Platform Services.
If required, select the Host Offline check box if this service host is offline so that the Console will not attempt to contact it.
If required, click Select to choose the certificate to apply to the service host.
For more information about certificates, see Working with Certificates.
Click OK to save the new service host information.
Discover Running Service Hosts
The Console’s Discover feature can be used to search subnets and individual service hosts for running service agents that can then be added.
Click .
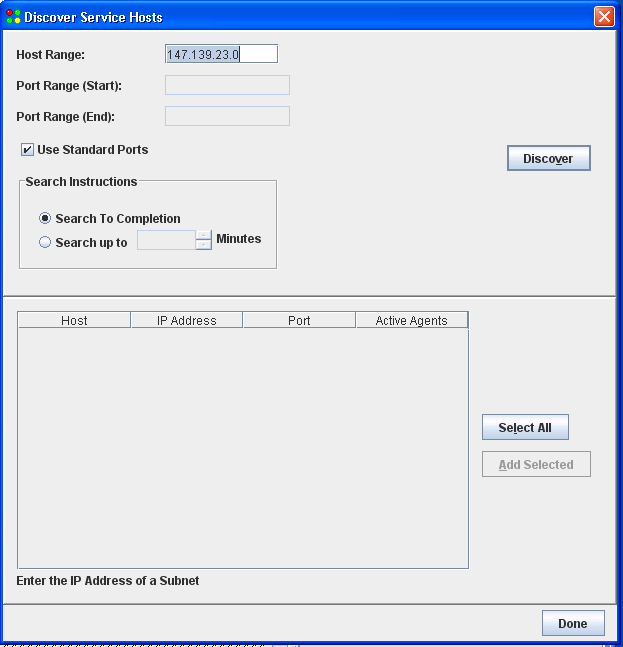
In the Host Range field, enter the range of service host IP addresses to include in the search.
Note
The range must be separated by a hyphen. For example, 192.10.23.10-192.10.25.10 where the first IP address in the range is 192.10.23.10 and the last IP address in the range is 192.10.25.10.
In the Port Range (Start) and Port Range (End) fields, specify a range of User Datagram Protocol (UDP) ports to include in the search.
Specify search instructions to either search the ranges completely or search the ranges only for a defined number of minutes.
Click Discover to begin the search.
Tip
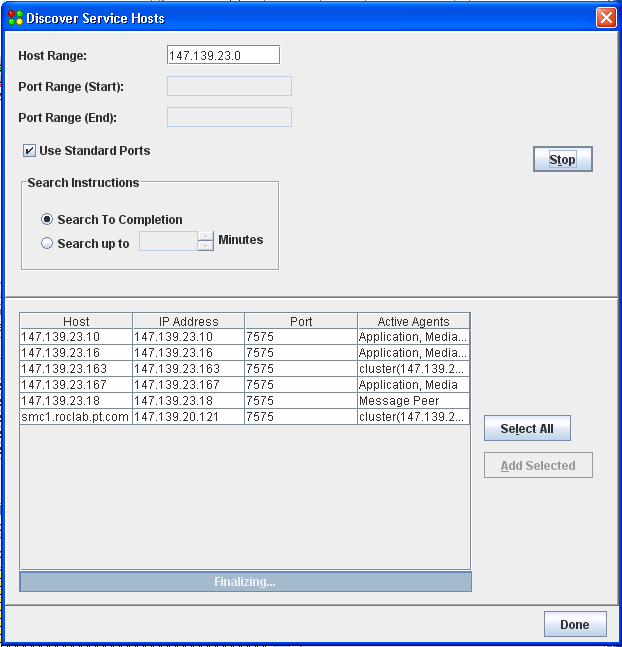
Click Stop at any time to end the search.
Select the host or hosts to add to your Console inventory.
Click Add Selected.
The selected hosts are added to the Object panel and no longer appear in the Discover Service Hosts window.
Click Done when you have finished the search and added all the necessary service hosts.
Working with Certificates
The features available for working with certificates can be accessed from the Server menu or by right-clicking on a service host in the Object panel.
Create a Certificate Store
Before you can import or set certificates for a service host, you must create a certificate store.
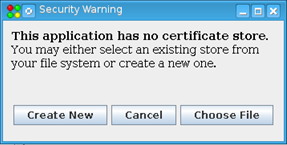
The first time you try to do anything with a certificate, you will automatically be prompted with a security warning to create a certificate store.
When the Security Warning window appears, click Create New or Choose File.
Select an existing file or enter a file name to create a new file.
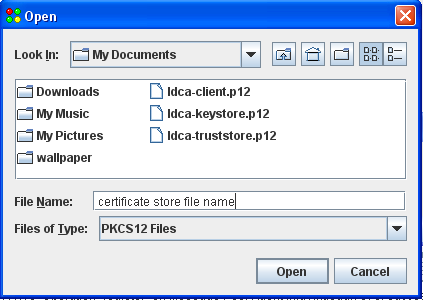
Click Open.
Enter a password for the file.
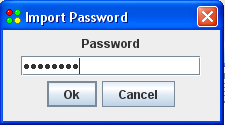
Click OK.
You can now import and manage certificates.
Import Certificates
Certificates must be imported into the Console to make them available to be set to a host service.
Click .
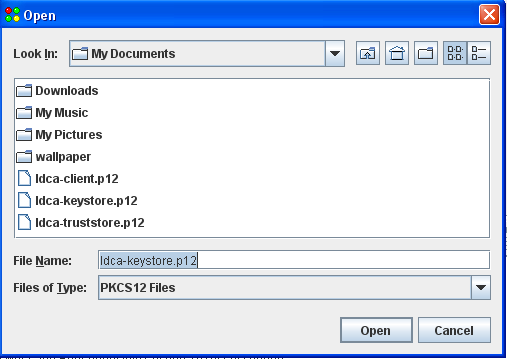
Select the certificate file to import.
Click Open.
Enter the import password for the certificate file.

Click OK.
Select the certificate in the left column and click Import.
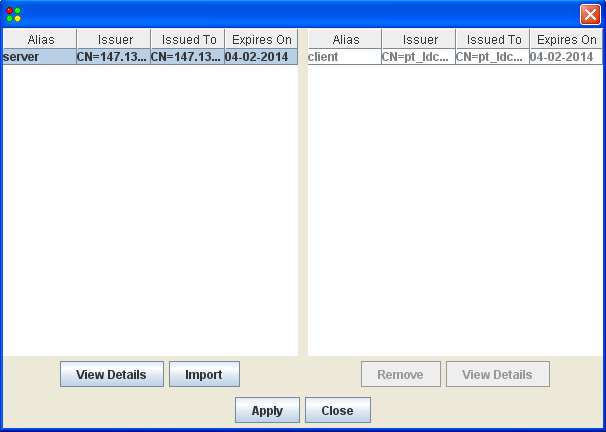
Re-enter the import password for the certificate file.
Enter the import alias for the certificate file.
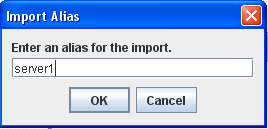
9.Click OK. 10.Click Apply.
The certificate moves to the right column. You can now set this certificate for a service host, view the certificate information, or remove it from the Console.
Set Certificates to Service Hosts
In the Object panel, select the service host.
Click .
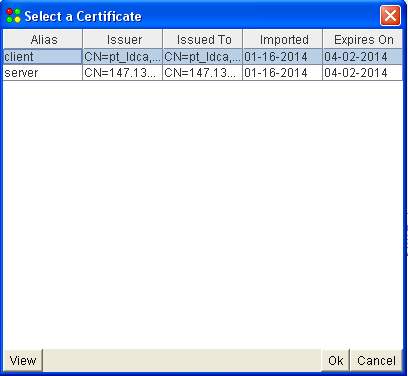
Highlight the appropriate certificate in the window.
Click OK.
The certificate is applied to the service host, and that service host icon in the Object panel will now display with a lock to indicate that it is secure.
Manage Certificates
From the Console Certificates window, you can view the contents of the certificates that have been imported into the Console, import more certificates, remove certificates, and change certificate settings.
View Certificate Information
Click .

Highlight a certificate.
Click View Client Certificate.
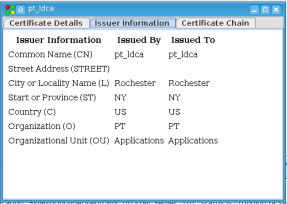
Click the tabs to view additional information.
Remove a Certificate
Highlight the certificate that you want to remove in the Console Certificates window.
Click Remove Certificate.
Warning
The certificate is removed immediately without a secondary confirmation.
Manage Certificate Settings

Click Settings.
Click Save As to save the certificate store with another name.
Click Open New to create another certificate store.
Click Change Password to change the password for the certificate store.
Note
This does not change the import password for specific certificates.
Working with Applications
Set Up Application Repositories
The Console can run applications from the /usr/sipxpress/apps directory of the application server or from any Web-accessible directory acting as an application repository.
Click .
The Application Source Repositories window appears.
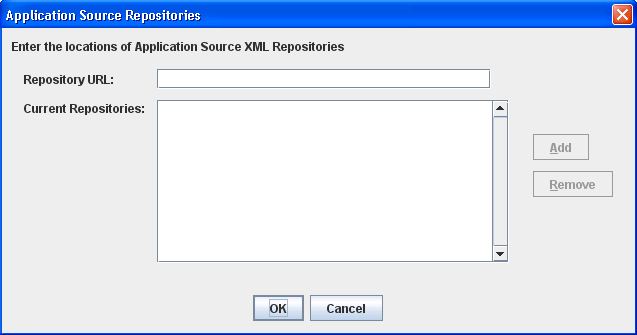
Type the Repository URL.
Click Add.
Repeat steps 2 and 3 until you have added all of the required repositories.
Click OK.
All applications in the Current Repositories list will be an available option in the Start Application window.
Start an Application
Before you start an application, verify that the application server is up and running.
In the Object panel, right-click Applications.
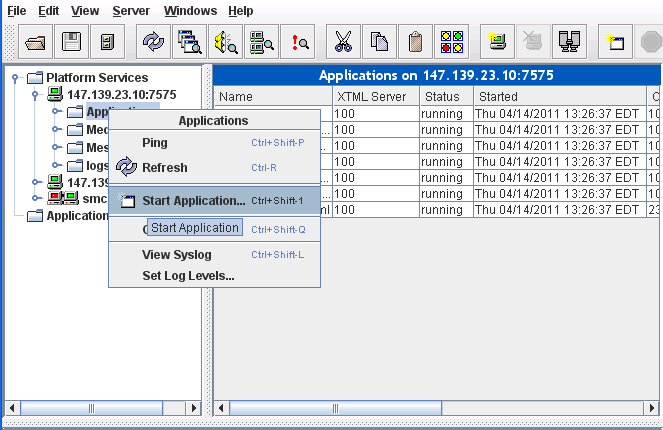
Click Start Application.
The Start Application window will appear.

In the Application Name field, select the application that you want to start.
Note
The applications that are available to start must reside in the /usr/sipxpress/apps directory or in an existing application repositories.
Enter the number of sessions that you want to run.
If necessary, select the Generate Trace File check box. The trace file is logged to the /usr/sipxpress/logs directory.
Specify stop instructions to determine whether the application should run until it is manually stopped or run only for a specified number of iterations.
Click OK.
Tip
To verify that an application has started and successfully completed, select the service host in the Object panel, expand the Logs folder, and select the PS_SysLog.txt file.
Monitor Sessions
You can monitor sessions using the Monitor Sessions window. For more information, see Monitor Sessions Window.
Add and Remove Sessions
In the Object panel, right-click the application that you want to manage sessions for.
Click Manage Sessions.
The Manage Sessions of Application window will appear.
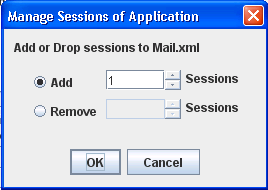
Select Add or Remove and enter the number of sessions that you want to add or remove.
Note
When you remove a session, it is removed as an iteration of a session that is completed. Therefore, the session count may not be updated immediately.
Click OK.
Stop an Application
In the Object panel, right-click the application that you want to stop.
Click Stop.

Select the Stop Application Gracefully check box to allow each running session to complete its current iteration before stopping.
Click Yes.
Working with Media Servers
The Console allows you to monitor the running of a media endpoint. You can view detailed information associated with media servers.
Monitor Endpoints
In the Object panel, select a service host.
Select the media endpoint that you want to monitor.
Click .
The Monitor Endpoints window will appear with information about the selected endpoint. For more information, see Monitor Endpoints Window.
Working with Message Peers
The Console allows you to view information about message peers or service hosts that communicate to each other.
To view message peers for a particular service host, select Message Peers under the service host IP address listed in the Object panel. The related information, such as connection state, appears in the Information panel.
SNMP Traps
Before you can receive SNMP traps, the SNMP-managed device (equipment sending the traps) must be configured to send traps to the Console on port 1162. For more information about SNMP devices, see the Application Server User’s Guide.
Note
To receive SNMP trap notifications of HA events, the NIU configuration must include the ps_c_adapter and application-properties in the ps_master_config.xml file. For more information, refer to the example configuration files in Appendix A of the Application Server User’s Guide.
When the Console receives a trap, there is an audible beep, and the Trap Display window opens. New traps are indicated by the color red.
View SNMP Traps
Click .
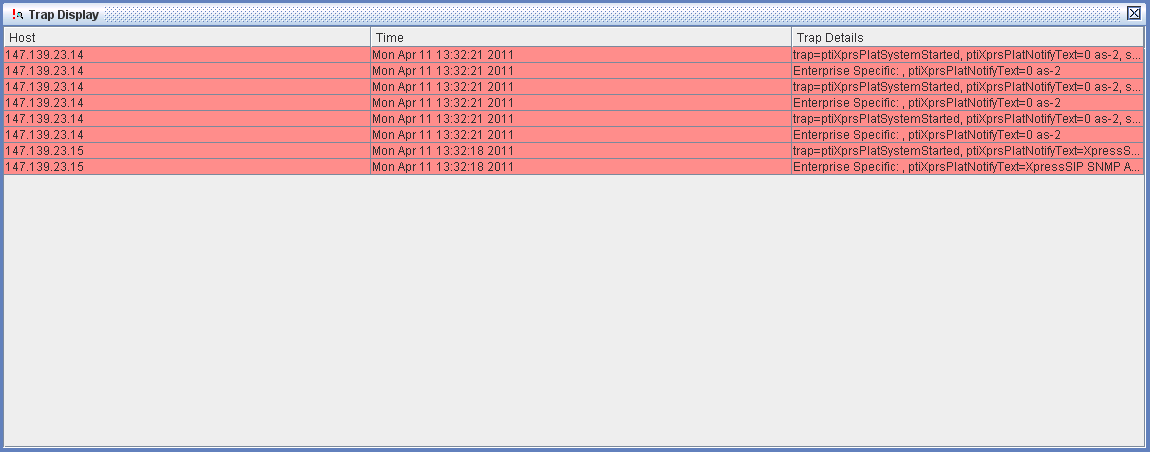
Note
The Console only displays traps received after the Console session was started.
Working with Log Files
Log files, such as the PS_SysLog.txt file and other application-specific log files, are essential for locating and resolving errors. Each message in the log files produced by the application server shows the date and time the message was generated, the log level, and the message text.
Log Levels
The following table describes each log level that can be generated by the application server.
Level |
Description |
|---|---|
System |
Basic system information (such as a process starting or stopping). These messages cannot be disabled by setting the log level. |
Error |
System errors that can cause processes to restart or stop. |
Warning |
Warning messages that indicate that something unexpected happened (such as an unexpected message was received), that there is a problem with another part of the system, or that an outside source may require investigation. The process for which a warning message is issued should automatically recover. |
Info |
Information about basic events that transpire (such as a SIP Invite message was received). Typically, this level is used for tracing calls through the system. |
Debug 1/2/3 |
Primarily used by developers when debugging a problem in a production system. Because the amount of logging on this type of system is high, this level should not be used under normal circumstances unless instructed by Customer Support. |
The Console allows you to set the lowest log level to be written to the log file for a specified process. Therefore, if you set the log level for a particular process to Warning, only warning messages and higher (Error and System) are written to the log file for this process. This allows you to tailor the log file to the level of detail that works best for you. For processes that you are particularly concerned about, set the log level to Debug 1. For other processes that you are not concerned about, set the log level to Error.
If required, you can set all processes to the same log level. Use this log level as the baseline for most processes, and you can then modify the log level for individual processes as required. Typically, the baseline log level is set to Error.
Set Log Level
In the Object panel, select the service host that you want to change the log level for.
Click .
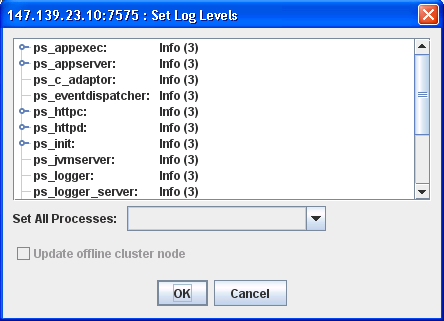
Do one of the following:
To set the same log level for all processes, select a log level from the Set All Processes field..
To change the log level for a specific process, right-click that process and select the required log level.
When you are finished setting the log levels, click OK.
Search Log File Text
You can use the Find Text feature to search for and find specific text in a log file to easily locate information.
Open a single log file.
Press Ctrl+F.
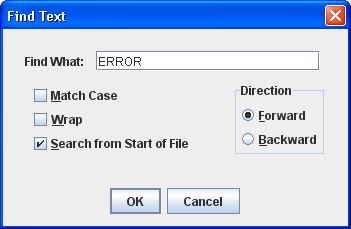
In the Find What field, enter the text that you want to search the log file for.
Select the required options and click OK.
Press F3 to find the next occurrence of the text.
Tip
You can also perform a Find and Find Next by right-clicking in the window and selecting an option.
Save a Console Configuration
Click or .
Tip
To update the display at any time, click .
Exit the Console
Click .
Manage Licenses
The License Manager allows you to gather licenses using some or all of these sources and eliminates any duplicates. You can then manually remove unnecessary or old licenses from the License Manager (see Delete a License).
When the licenses are compiled as required, you can save these licenses to a file or upload them to a license server (see Save Licenses to a File and Save Licenses to a License Server).
Open the License Manager
Click .

The License Manager window will appear.
Obtain a License from a License Server
In the License Manager window, click .
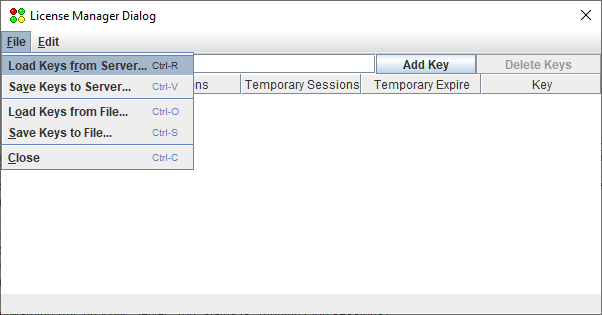
Enter the license server’s IP address or host name.
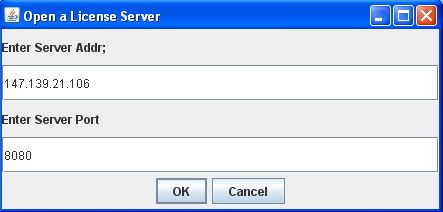
Click OK.
Obtain a License from a File
In the License Manager window, click .
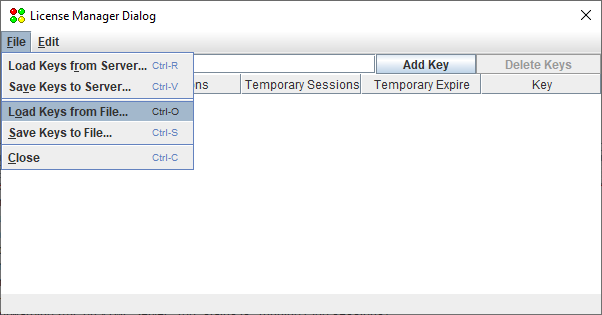
Browse for the license file.
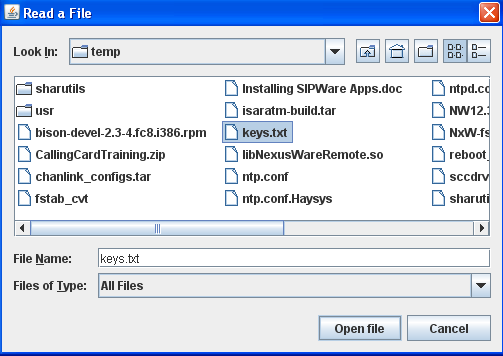
Click Open file.
Copy and Paste a License Key
Using any text editor, highlight the license key text from the license file.
Copy the selected text of the license key from this file and paste the license key into the License Manager window.
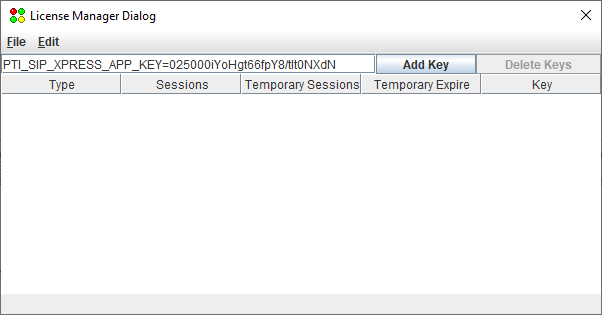
Click Add Key.
Delete a License
In the License Manager window, click the license that you want to remove.
Tip
Use the Ctrl key to select more than one license file at once.
Click Delete Keys.
Save Licenses to a File
In the License Manager window, click .
Save Licenses to a License Server
In the License Manager window, click .
Enter the IP address or host name of the license server that you want to save the license to.
Click OK.
