Building Applications
To create an application using the SCE, follow these general steps:
Define the variables to be used.
Add functions - event handlers and called functions.
Build the functions.
Check the syntax.
Transfer to provisioning application server or web server.
Define Variables
Typically, applications need to maintain call information (phone numbers, SIP URLs, account information, or mobility information), and variables store this information.
The following types of standard variables are available:
string
short
int (integer)
long
float
Boolean
object
The following types of custom variables are available:
SipDialog - holds the state and relevant information about a SIP session
SipDialogArray
MediaEndpoint - holds state and other relevant information about an RTP stream for use with the built-in media server and conference capabilities
MediaEndpointArray
Conference - holds state and other relevant information about a conference
ConferenceArray
SipMessage - most often used in an onSipDialogRequest function/event handler with a parameter for the invite message (SipMessage)
Add Variables
Click the Variables tab at the bottom of the workspace pane. A list of current variables will be shown.
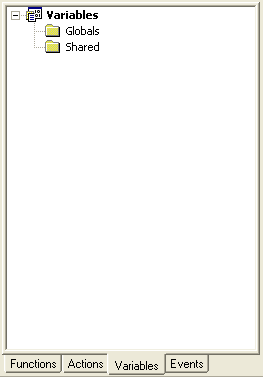
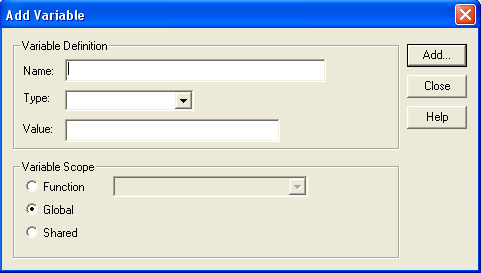
Right-click in the workspace pane, and then click Add Variable.
Tip
You can also click or press [ctrl] + R to open the Add Variable window.
Type the Name of the variable. This name must be less than 32 characters and contain only alphanumeric characters and underscores.
Select the variable Type.
Note
For more information about using object variables, see Complex Variables.
Type an initial Value for the variable.
Select the Variable Scope. If you select Function, you must also select the specific function that the variable will be defined in.
Note
For information about the scope of variables, see Variables.
Click Add.
The new variable is listed on the workspace pane under Variables and under its selected scope. Variables defined for specific functions will be listed on the Functions tab under the function that they are associated with.
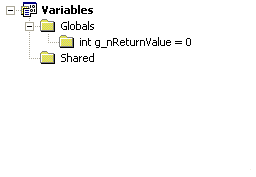
Add more variables as needed and click Close when you have finished adding variables.
Modify Variables
Right-click the variable that you want to modify.
Click Modify.
Make changes to the variable as needed.
Click Close.
Delete Variables
Right-click the variable that you want to delete.
Click Delete.
Verify that you want to delete the variable.
Click OK.
Assign Standard Prefixes to Variable Names
Naming conventions allow you to automatically populate the type prefix and scope prefix of a variable based on its name.
For example, if you specify that variables with a prefix of n are of type int, the SCE automatically populates the Type field with int whenever you add a variable with a name that begins with n.
Click .
Click the Naming Conventions tab.
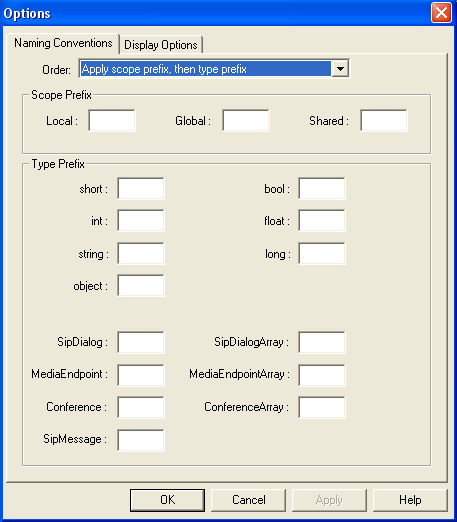
Select the Order for the type of prefix to appear in the variable name.
Enter the Scope Prefix to be used.
For example, to have global variables start with g_, type g_ in the Global field.
Enter the Type Prefix to be used.
For example, to have string variables start with str, type str in the string field.
6. Click OK.
Add Functions
After the variables that will be passed to the application have been defined, the next step is to add functions using the Functions tab in the workspace pane and the drawing pane.
For more information about what an example function looks like in the workspace pane, see Appendix A: Example Function.
Add Event Handlers
To build functions that respond to specific events, you must first add event handlers for the associated events. For more information about events, see Working with Events.
Click the Events tab at the bottom of the workspace pane.
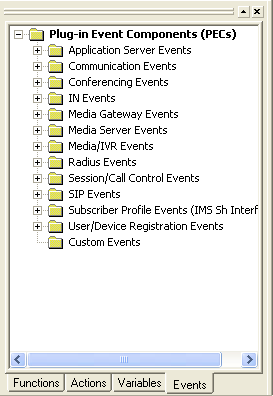
Expand the folder that contains the event.
For example, to add a handler for the SessionStart event, expand the Application Server Events folder.
Right-click the event that you want to add a handler function to, and then click Add Handler. The Add Event Handler window appears.
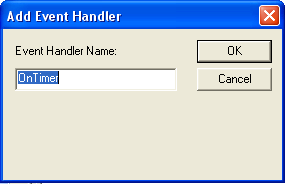
Type an Event Handler Name or use the default name.
Tip
For some events, there is a Public event handler checkbox in this window. Select this checkbox only if the event associated with the event handler can be sent to any session. In general, you should designate a public event handler if you want that event to initiate a session instead of sending the event to a session that is already executing.
Click OK.
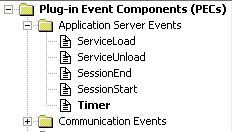
The event appears in bold to indicate that it has been added. Additionally, a handler function is added to your application. Now you can build a function that the application server will call when the associated event occurs.
Add Called Functions
Called functions are useful when you have a set of actions common to multiple functions. Rather than adding the actions to each function individually, you can create one function that is called from the appropriate places throughout the application.
Click the Functions tab at the bottom of the workspace pane.
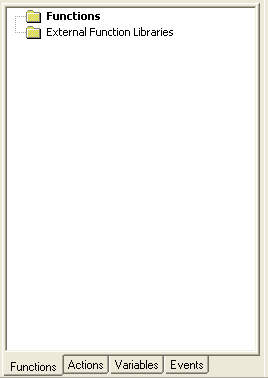
Right-click in the workspace pane, and then click Add Function.
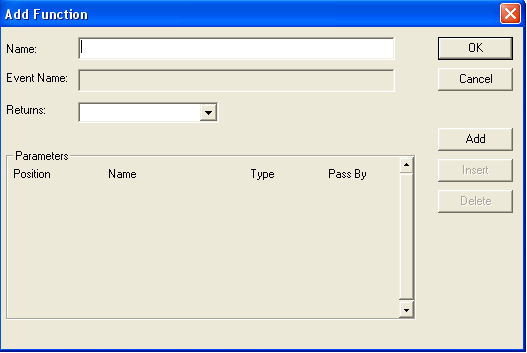
Type the Name of the function.
Select a Returns option if a value is returned by the function.
Click Add to add parameters that can be accepted by the function as variables that contain information passed to this function from another function.
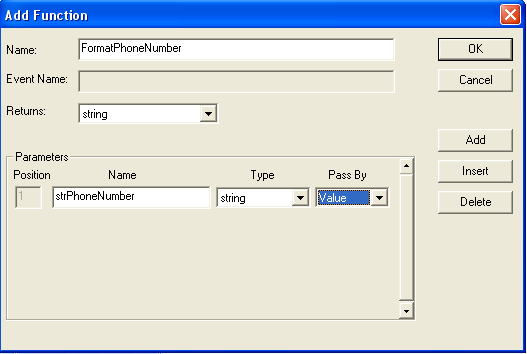
Tip
Click Insert to add a parameter below the parameter currently selected. Click Delete to remove a parameter. Parameters must be added in the order that they appear in the function.
Click OK.
The new function is listed on the workspace pane under Functions.
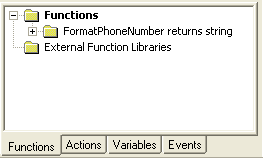
Now you can build a function that can be called using the Call a Function PAC.
Build Functions
To build functions using plug-in action components (PACs), follow these general steps:
Add the PACs to the function.
Configure the PACs.
Connect the PACs in the required order.
Add PACs
From the drop-down list on the tool bar, select the function that you want to build, and the drawing pane will be updated with any PACs that can currently be defined for that function.
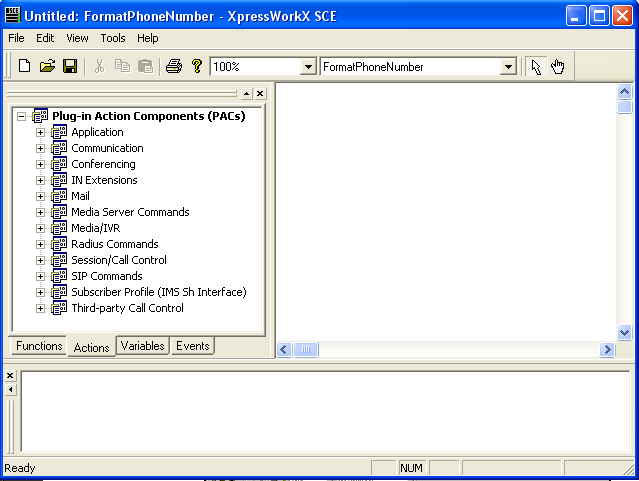
Click the Actions tab at the bottom of the workspace pane.
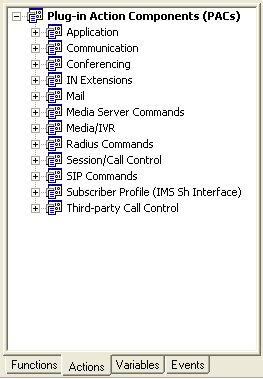
Click the plus sign (+) next to the folder to expand the list of PACs.
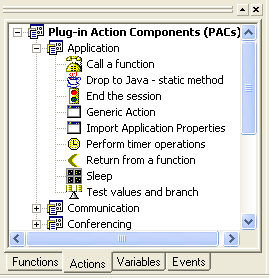
Click and drag a PAC into the drawing pane. The PAC appears in the drawing pane.
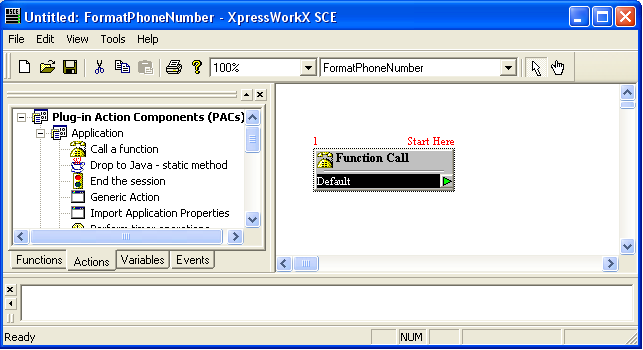
Note
An ID number appears above each PAC in the drawing pane. This number does not represent the PAC order in the call flow.
Delete PACs
Select the PAC in the drawing pane.
Tip
To select a group of PACs at once, left-click in the white space of the drawing pane and drag the mouse over the PACs to be deleted.
Click or press the Delete key.
Configure PACs
Most PACs require configuration. Each PAC has a properties window associated with it, which has a Description tab, a Custom tab, and one or more tabs containing fields for the configuration information.
The Description tab is used to enter a text description that appears on the PAC in the drawing pane.
For information about using the Custom tab, see Custom Results.
The following image shows an example of a PAC properties window and shows the key features of a tab.
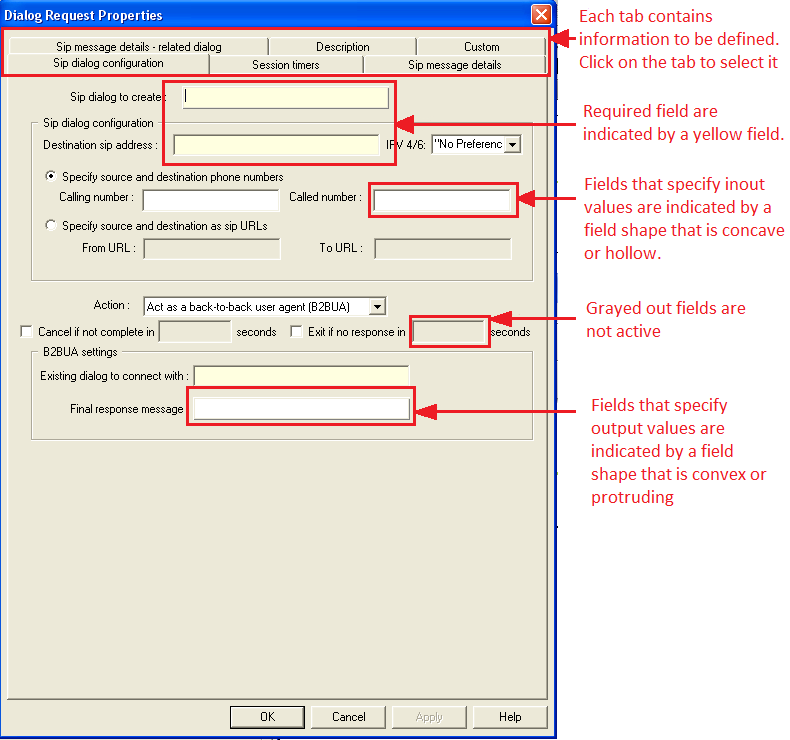
Double-click a PAC, or right-click and then click Properties. The properties window associated with that PAC appears.
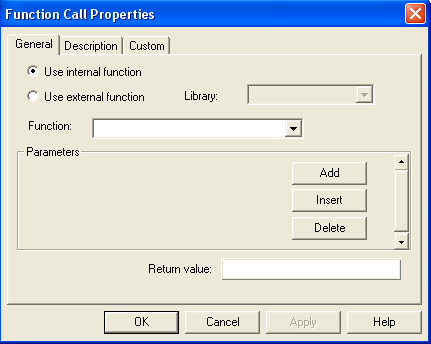
Click the Description tab and enter a brief description of the PAC function. This description is displayed on the PAC in the drawing pane.
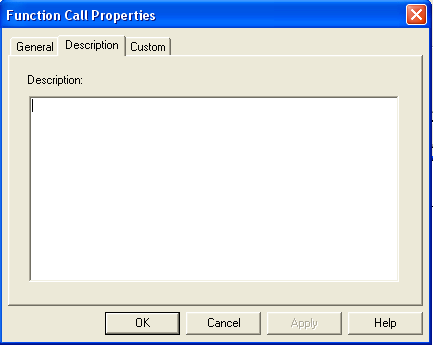
Select the additional tabs and enter the required values.
When all tabs have been completed, click OK.
Custom Results
Each PAC has a set of possible results, or exit paths, that are used to determine call flow. The SCE distinguishes between predefined and custom results. The predefined results are displayed the first time you put the PAC in the drawing pane.
From the drawing pane, you can add one or more custom results to any action. Custom results are given a display name and a set of conditions that are evaluated to determine whether the custom result is true or false. The conditions for the custom result can compare the values of any variables in the application and consider the predefined result returned by the action. These conditions can be combined into more complex statements using standard and, or, and not comparative statements.
When the PAC has completed processing, the predefined and custom results are evaluated in the following order:
The action returns a single predefined result as the outcome.
If custom results are defined for this action, they are evaluated in turn (from top to bottom as they are displayed in the SCE drawing pane). The first custom result found to be true becomes the operative result.
If a custom result is found to be true and there is an output path for that result, then that path is followed to the next PAC.
If there is an output path for the predefined result, then that path is followed to the next action.
If there is an output path from the default result, then that path is followed to the next action.
Add Custom Results
Double-click a PAC, or right-click and then click Properties. The properties window associated with that PAC appears.
Click the Custom tab.
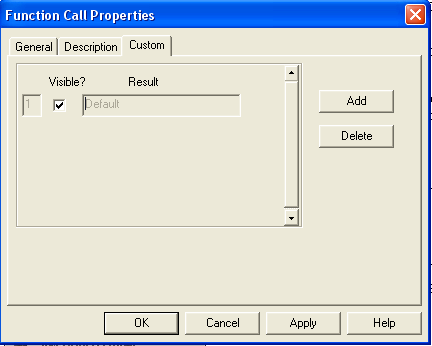
Click Add to add a result other than the default.
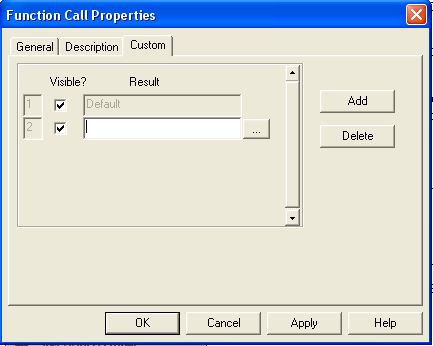
In the Result field, type the name of the result.
Select the Visible checkbox to display the result on the PAC.
Click Apply and then click OK.
Connect PACs
To specify the flow of actions, you must connect one or more results of each PAC to another PAC that will be executed when that result is received.
Establish a Single Connection
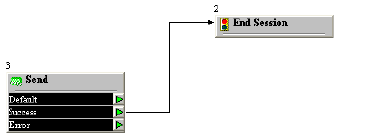
Click the green result arrow on the PAC. The selected arrow turns red.
Drag to the PAC that will be executed next if that result is received. A line is created between the two PACs to indicate their relationship.
Note
You can make connections from multiple results (on the same PAC or different PACs) to a common PAC.
Tip
When many lines point to the same PAC, it can be difficult to discern individual lines. To see a connection more clearly, click on the connection line to highlight it in red.
Establish Multiple Connections
While the common use case will be connecting results to PACs individually, you can also connect multiple results to a single PAC at the same time.
Press the [Ctrl] key while clicking the result triangles of each result that you want to initiate a connection from.
Click the destination PAC.
Delete Connections
Click the line that represents the connection that you want to delete. The selected line will turn red.
Click or press the Delete key.
Tip
To select multiple connections to delete, press the [Ctrl] key while clicking the result triangles of each result that initiates a connection that you want to delete.
Check Syntax
Before saving your application, you should check the syntax to make sure there are no errors.
Click .
Review the build output pane at the bottom of the SCE user interface for a list of errors and warnings.
Make changes if needed and recheck.
Save an Application
After all errors have been corrected, the next step is to save the application to create the XTML document that is provisioned to the Application Server or web server.
Click .
In the Save As window, open the folder where the application is to be saved.
Enter a name for the application.
Click Save.
View the Source Code
After you save an application, you can view the XTML text by opening the file in Internet Explorer, Notepad, or another text editor.
Warning
Applications must always be created and edited in the SCE drawing pane. Do not make changes to an application in the XTML document.
Print an Application
You can print the drawing pane flow-chart view of an application for reference.
Click .
Choose the orientation best suited to your application.
Tip
To see page break lines, click . You can change the page break display from portrait to landscape in the Display Options window.
Click OK.
Click .
Choose the print options.
Click OK.
Provision Applications
For an application to run, it must be provisioned on either an Application Server or a web server.
Add a Transfer Location
Click . The File Transfer Locations window appears.
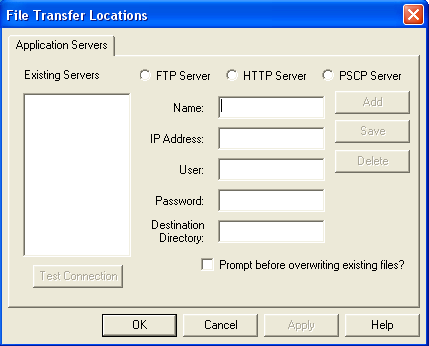
Select the type of location from the Existing Servers.
Type a Name for the location. This name will appear in the Tools menu.
Type the corresponding IP Address for the location.
Type the Port for an HTTP server, or a User and Password for an FTP or PSCP server.
Type the Destination Directory where the application is to be copied. This should be the app subfolder under PS_ROOT.
Click Add. The new server now appears as an option in the menu.
With the new server selected, click Test Connection to verify a successful connection. If the test does not succeed, contact your system administrator.
Click OK.
Distribute an Application via FTP
To distribute an application, go to the Tools menu and select the location where you want to send the application. A message appears when the transfer is complete.
Warning
When you make changes to an application in the drawing pane, you must save and reinstall the application in order to have those changes to take effect.
Run an Application
Applications that run on the Application Server are controlled through the Console. With the Console, you can perform tasks such as start and stop applications and determine the number of running application sessions.
For more information about working with the Console, see the Console User’s Guide.
Find Errors with the SCE
The Console produces a ps_syslog.txt log file. Error messages in this log file specify both the application and the PAC in which the error occurred. Some errors with PACs can be found using the SCE.
Click . The Find an Action window appears.
In the Function/Event Name field, select the function that contains the PAC.
In the Component Number field, type the PAC ID. This is the number that appears above the PAC in the drawing pane.
Click OK.
The function appears in the drawing pane, and the PAC in question is selected. The PAC ID is red.
XTML Libraries
When working on a large team development project, the project or application may need to be broken into modular pieces to be developed independently. To support this type of development approach, the Application Server supports the concept of XTML libraries.
There are XTML application documents and XTML library documents.
XTML application documents contain the event handlers of the application. This is the document that is loaded from the Console to start an application.
XTML library documents contain reusable functions that can be called from multiple XTML applications. Functions in one XTML library document can call functions in other XTML library documents.
In addition to functions, an XTML library can also contain variable definitions and global JavaScript functions. For information about using JavaScript, see Enhancing Applications with JavaScript.
Typically, XTML libraries are used to develop low-level, reusable functions that can be called from multiple applications. For example, a library of call control functions such as out dialing a party, hanging up a party, and putting a party on hold could be constructed so that multiple applications can use these operations in different ways.
An application calls an external function, using the Call a Function PAC, in exactly the same way as calling a function from within the same XTML document.
Resolve XTML Libraries
When an application is loaded, libraries that the application depends on are also loaded. The application server must be configured with the following information:
The names of the XTML libraries to search for unresolved function names.
The search path to look for the identified XTML library documents in.
The search path is a list of directory names or HTTP URLs separated by semi-colons. HTTP URLs are useful because they allow reusable library functions to be retrieved from a centralized web server.
This configuration information is in the <xtml-server> element of the ps_master_config.xml file. For more information about configuring the <xtml-server> element in this file, see the Application Server User’s Guide.
Since references to external functions are resolved at application load time, it is possible to update an XTML library and distribute it without requiring any recompilation or redistribution of the XTML applications or libraries that use it. The next time an XTML application is loaded in a new XTML server process, it reloads the library with the changes.
Load XTML Library Documents into the SCE
As you create applications, it can be helpful to have the XTML library documents available within the SCE for reference.
Click .
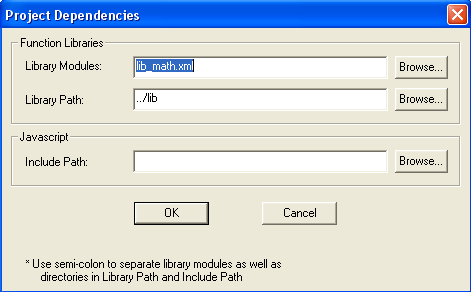
In the Library Modules field, type the name of the library document or browse to find the name.
In the Library Path field, type the path to the library document or browse to find the path.
In the Include Path field, if needed, type the path to the JavaScript file or browse to find the path.
Click OK.
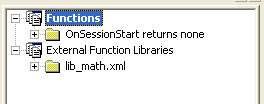
The XTML library document is listed on the workspace pane under External Function Libraries.
Complex Variables
The SCE supports both simple and complex variables. Simple variables are the types string, short, integer, long, float, and Boolean. Sometimes, however, it is useful to be able to represent more complex data such as arrays and structures. For these purposes, the SCE also supports the complex object type.
The object data type concept is similar to the JavaScript object class and has many of the same features. The object data type can hold multiple values and supports retrieval of those values using either the array operator ([]) for indexing by number or the dot operator (.) for indexing properties by name.
Create an Object Variable
Object variables are created in the same way simple variables are created.
Click . The Add Variable window appears.
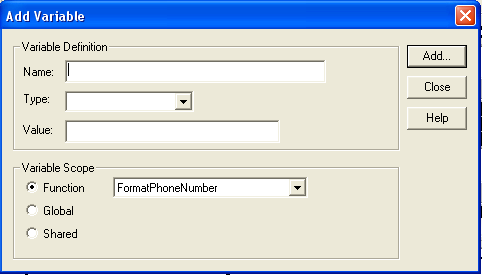
Type the Name of the variable.
Select object in the Type field.
If required, type a Value to initialize the variable.
If no value is provided, the variable is simply created as an empty object. It can then be populated at runtime via JavaScript or values returned from PACs.
If a single integer value is provided, the object is created as an array with the number of entries specified by the integer. The array can then be dynamically extended or truncated at runtime via JavaScript.
If a comma-separated list of values is provided, the object is created as an array with the initial values provided for each element. For example, if the following initial value was provided, the object would be created as an array with three elements:
10, 3.5, "hello"
The first value in the array is an integer (10), the second is a float (3.5), and the third is a string (“hello”).
Tip
Indexed values start from zero just as they do with JavaScript. For more information about using JavaScript, see Enhancing Applications with JavaScript.
Select the Variable Scope.
Click Add.
For more information about working with variables, see Define Variables.
Similar to JavaScript, indexed or named member variables of a complex XTML variable are created when accessed if they do not already exist. For example, if you declare an object variable called myObject, and you do not provide an initial value, the variable initially has no member variables. However, executing the code below causes the variable to have 10 indexed member variables and 1 named member variable.
//creates elements [0] through [9]. All but [9] are uninitialized
Session.myObject[9] = 10 ;
//creates a property called 'speeddial'
Session.myObject.speeddial = "8005551234" ;
Object Variables with Array Data
To use an object variable to hold array values that are accessed by number, you can assign them to the object using the array notation ([]). The following applies to array operations:
Arrays are zero-based so the first entry is referenced as object [0].
You can assign a value to any element of an array at any time.
Note
If the element did not previously exist, the array is dynamically extended to include that element. For example, if you have an array with two values (indices 0 and 1), and you then assigned a value to index 5, the array would automatically be extended to have indices 0 through 5.
You can determine the length of an array at any time by accessing the .length property of the object that returns an integer indicating the current number of elements in the array.
You can truncate or extend an array dynamically by setting the value of the .length property of the array.
The following example shows handling and object type variable as an array:
//assume I have an xtml variable 'myObject' of type object
Server.logInfo("Number of elements is " + Session.myObject.length ) ;
//assign a progression of squares to the first ten indices
for( var i = 0; i < 10; i++ ) {
{
Session.myObject[i] = i * i ;
}
Server.logInfo("Number of elements is now" + Session.myObject.length ) ;
//truncate the array back to five elements
Session.myObject.length = 5 ;
Server.logInfo("Number of elements is now" + Session.myObject.length ) ;
Object Variables with Structure Data
To use an object variable to hold a set of values that are accessed by name, use the dot (.) operator.
To create a named property of an object variable, you will need to assign a value to that property name using JavaScript.
The following is an example of the dot (.) operator in use:
//assume I have an xtml variable 'myCall' of type object

Session.myCall.DNIS = "8005551234" ;
Session.myCall.ANI = "7815551234" ;
A common reason to use object variables in this way is to group a set of related data for maintenance. Since object variables can be passed to functions, it is simpler to pass a single object variable to a function rather than passing multiple individual variables.
Object Variables with Array and Structure Data
Array accessors and property accessors can be used together in the same object, and there is no limit to how array data and structure data can be combined.
The example below shows a rowset returned from a database stored procedure. In this example, the entire data set is returned into an object variable. The object variable has an array of values. Each index in the array represents one row and has multiple properties, each representing one column value.
for( var i = 0; i < Session.g_oRowSet.length; i++ ) {
        Session.g_strBatchExpireDate = Session.g_oRowset[i].batchExpireDate;
        Session.g_intParentCompanyId = Session.g_oRowset[i].parentCompanyId ;
        Session.g_intUnitsStart = Session.g_oRowset[i].units;
        Session.g_intOutCallCountT= Session.g_oRowset[i].outCallCountT;
        Session.g_intOutCallCountR= Session.g_oRowset[i].outCallCountR;
        Session.g_bFirstOutdialAttempt = Session.g_oRowset[i].firstOutAttempt;
        Session.g_bFirstSds = Session.g_oRowset[i].firstSDS;
        Session.g_bCardActive = Session.g_oRowset[i].cardActive;
}